Most first kegging days go the same way. The transfer feels clean, the lid seats with a satisfying thunk, the regulator looks dialed in… and the first pour comes out like a fire extinguisher. Then the second pint is half foam, half flat, and now you are staring at the gas post like it personally offended you.
So here is the straight answer to how to keg homebrew beer: clean and sanitize the keg, check the gas side for leaks, purge the keg with carbon dioxide, transfer the beer with as little splashing as possible, chill it all the way down, carbonate it based on beer temperature and the level of fizz you actually want, then serve it at a pressure and line setup that match each other.
That plain answer is right, and it is still incomplete. A warm keg can make good pressure look bad. A hoppy pale ale can taste tired from a sloppy transfer even when the carbonation is dead on. And a random “12 PSI works for me” tip can be about as useful as borrowing someone else’s shoes.
Here’s what this guide will sort out:
- What gear matters for a clean first kegging setup
- How to choose the right transfer method for the fermenter sitting in front of you
- Which carbonation method fits a rushed weekend versus a calm, predictable weeknight
- Why foamy pours are often a line and temperature problem, not just a pressure problem
- How to fix flat beer, gas leaks, and weird half-right pours without changing five things at once
Fast path: pick the workflow that matches the beer and the clock
| If this is your setup | Do this | Skip this trap |
|---|---|---|
| Basic bucket or fermenter with no pressure capability | Purge the keg, fill from the bottom with an auto-siphon or tap, then use set-and-forget carbonation | Don’t splash the transfer, and don’t rush straight into a shake method |
| Pressure-capable fermenter and hop-heavy beer | Use a closed transfer into a purged keg, then carbonate cold at a steady pressure | Don’t vent and refill the keg over and over for no reason |
| Beer needed fast for the weekend | Chill fully first, then use a cautious burst-carb plan and return to serving pressure | Don’t copy a random PSI number without checking beer temp |
The biggest win is not speed. It is fewer variables.
Set up the kegging kit so packaging starts simple

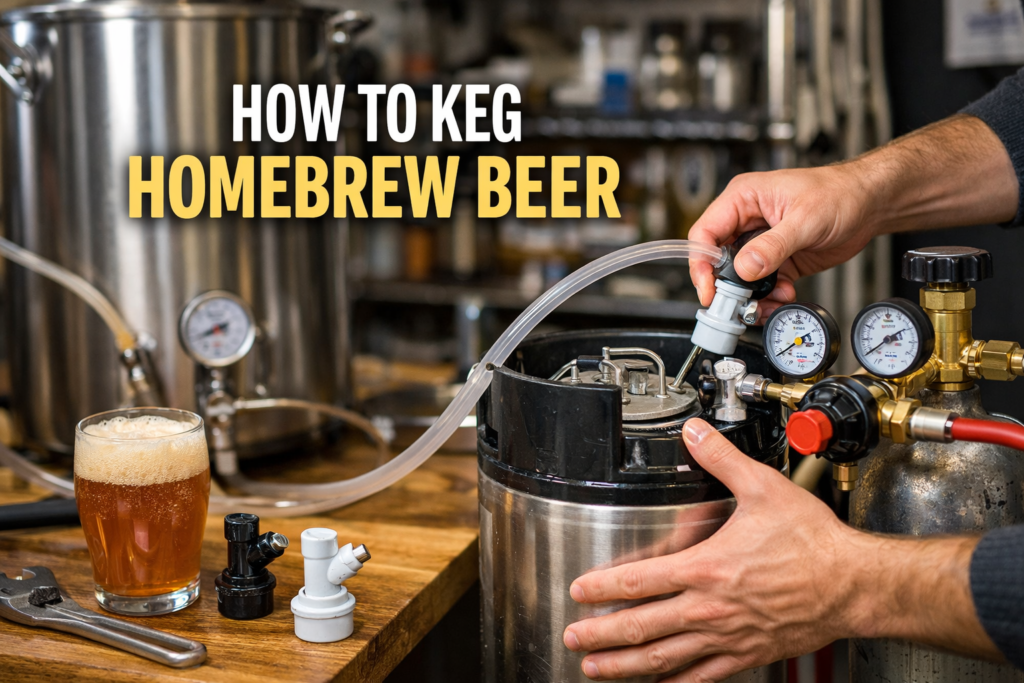
The American Homebrewers Association’s intro to kegging lays out the standard cast of characters: a Cornelius keg, a carbon dioxide tank, a regulator, gas and beer line, and some kind of tap. That basic list still holds because it works. You do not need a draft shrine. You need a setup that gives you control over pressure, a clean transfer path, and a sane way to pour.
Pick one keg standard and stop the parts confusion
For most homebrewers, that means a 5-gallon Cornelius keg with ball-lock posts. Pin-lock kegs still work fine, and some brewers love them, but mixing ecosystems gets annoying fast. Gas quick disconnects, liquid quick disconnects, spare poppets, and post sockets all get simpler when the whole setup speaks one language.
If you are just getting started, ball lock is the easy default. The parts are everywhere, and troubleshooting advice tends to assume that setup.
Know what the parts are actually doing
The gas post feeds pressure into the headspace. The liquid post pulls beer up through the long dip tube. The pressure relief valve, often called the PRV, lets you vent pressure when you need to reset or check the seal. The regulator sets tank pressure down to something useful. None of this is fancy. A keg is basically a stainless bottle with plumbing and manners.
Remember: gas disconnect on the gas post, liquid disconnect on the liquid post. It sounds too obvious to say out loud until someone forces the wrong fitting and spends ten irritated minutes blaming the keg.
Start with a simple way to serve
You do not need a full kegerator or keezer on day one. A chilled keg and a picnic tap will pour beer. It will not be glamorous, and it can be a little wonky for long-term use, but it works while the rest of the setup catches up.
When the serving side becomes the real bottleneck, this guide on setting up a kegerator is a good next stop because it gets into tower assembly, draft lines, and first-pour behavior without drifting away from the basics.
Clean the keg and leak-test the gas side so the batch stays protected

Cleaning and sanitizing get lumped together all the time, and that is where a lot of weird draft problems start. Cleaning removes grime, dried beer, hop bits, and old residue. Sanitizing knocks down the stuff you do not want living in your next batch. If the keg is used, you want both.
Strip the keg down and clean the sneaky parts
Take off the posts. Pull the dip tubes. Check the poppets. Look hard at the O-rings. The shell of the keg can look spotless while the inside of the liquid dip tube is hanging onto old beer stone or stale residue. Ask me how I know.
Worn O-rings deserve a little suspicion. They cause gas leaks, and they also carry old smells. If one smells like root beer, onion, or mystery garage funk, toss it.
Sanitize the keg and use gas pressure to help
Once the keg is clean, fill or swirl with sanitizer as directed by the sanitizer maker. Then push that sanitizer out with a little carbon dioxide. You do not need much pressure for this. About 5 PSI is plenty to move liquid through the beer line and tap. It is a nice two-for-one move because it also tells you the liquid path is open.
Check for leaks before the beer goes in
Spray the regulator connections, gas line joints, and keg lid area with starsan foam or soapy water. Tiny bubbles that keep growing mean a leak. Fix that now, not after the keg is full and you are trying to work out why the beer never seems to carbonate.
The safety side is short but worth saying clearly. The NIOSH carbon dioxide guidance describes carbon dioxide as a colorless, odorless gas that is shipped as a liquefied compressed gas. So keep the cylinder upright, secure it so it cannot tip, and do not treat an indoor gas leak like no big deal.
Note: a lid can look shut and still not be sealed. A quick burst of pressure and one check around the lid seam saves a lot of head scratching later.
Transfer the beer gently so you keep aroma instead of oxygen

The Brewers Association’s beer freshness material puts oxygen right in the middle of flavor stability, which is why packaging deserves more care than a quick slosh and a shrug. That matters most with hop-forward beer, pale lagers, and other styles that show staling quickly. A dark malt-heavy beer can forgive more. A bright IPA won’t.
Use the best transfer your fermenter allows
If the fermenter has a spigot, gravity transfer into the keg is fine. If it does not, an auto-siphon works. If the fermenter is pressure-capable, a closed transfer is better because it gives oxygen fewer chances to get involved.
The plain version of a closed transfer is simple. Purge the receiving keg. Put a gas line on the fermenter. Run beer from the fermenter to the liquid post on the keg. Then let pressure move the beer while the keg vents through the pressure relief valve or a spunding valve set lower than the fermenter pressure. Around 10 PSI on the fermenter and a lower vent pressure on the keg is a common homebrew example, not a sacred number.
Fill from the bottom and keep the beer calm
If you are siphoning into an open keg, send the beer to the bottom. That means tubing reaching down into the keg or entering through the liquid post if the setup allows it. Splashing looks harmless and sounds harmless. It is not. That froth is contact with oxygen, and hoppy beers feel it fast.
I have had pale ale batches look fine going into the keg and taste oddly dulled three or four days later. The culprit was not the yeast. It was the transfer.
Purge with a reason, not as a ritual
The point of purging is to replace oxygen-rich air in the keg with carbon dioxide before and after transfer. If you are brewing a porter and drinking it quickly, a decent purge and a careful transfer are often enough. If you are kegging a fresh dry-hopped IPA, it is worth being fussier. That is not paranoia. It is just matching the process to the beer.
Pro tip: copying another brewer’s transfer routine without matching the fermenter, tubing, and pressure setup is like copying someone else’s shoe size. It might fit. It might feel awful by the end of the day.
Carbonate on purpose so the beer matches your timeline and style
BeerSmith and BYO both describe the standard homebrew carbonation methods, and the big lesson is not that one method is “best.” It is that each one trades speed for control. The mistake is picking the method for the mood you are in instead of the beer you are serving.
Use set-and-forget when you want predictable beer
This is the calm route. Chill the keg all the way down, set the regulator to a pressure that matches the carbonation level you want at that temperature, and leave it alone for several days. For many everyday ales sitting at normal kegerator temps, around 10 to 12 PSI lands in the useful middle. That is a starting point, not a universal answer.
If the beer is not fully cold, the pressure number lies to you. Warm beer absorbs carbon dioxide differently, so the same PSI that works at fridge temp can look undercarbed or overcarbed while the keg is still dropping in temperature.
Use burst carbonation when time matters more than elegance
This is the “party on Saturday” method. Chill the keg first, raise the pressure for a shorter stretch, then drop it back to serving pressure and let the beer settle. Done with restraint, it works. Done with impatience, it creates the classic overcarbed, foamy mess that makes beginners think kegging is harder than bottling.
A lot of bad burst-carb stories are really temperature stories. The keg was not fully cold. The brewer kept bumping pressure to compensate. Then the beer caught up all at once.
Use shake carbonation only if you accept the tradeoff
Yes, shaking the keg can drive carbon dioxide in faster. It also makes the endpoint harder to judge. There is a reason experienced brewers keep coming back to more boring methods. Boring is repeatable.
Use natural carbonation when the setup calls for it
You can prime a keg with sugar and let the beer carbonate inside the keg the way bottles do. That path makes sense when carbon dioxide access is limited or when you like the softer rhythm of natural conditioning. The tradeoff is slower turnaround and sediment at the bottom of the keg.
| Method | Ready window | Control | Main risk | Best fit |
|---|---|---|---|---|
| Set-and-forget | Several days | High | Impatience | Most beers, most brewers |
| Burst carb | 1 to 2 days | Medium | Overcarbing | Tight timeline, already cold beer |
| Shake method | Very fast | Low | Hard-to-read endpoint | Only when speed matters most |
| Natural carbonation | Longer | Medium | Sediment and slower reset | Low-gas setups or bottle-conditioned feel |
The BJCP 2021 style guidelines are useful here because they show how carbonation shifts the impression of a beer. British-style bitters often read better lower. Many standard ales and lagers sit happily in the middle. Wheat beers and some Belgian styles often want more lift. A good middle target for a lot of homebrew is around 2.4 volumes of carbon dioxide. Lower-carb beers often land around 1.8 to 2.0. Brighter, fizzier styles can push past 2.7.
Balance the draft line so the first pour stops fighting you

The Brewers Association’s Draught Beer Quality Manual gives two numbers that snap this whole section into focus. It says kegs should be at or below 38°F when served, and in direct-draw troubleshooting it points to 4 to 5 feet of 3/16-inch vinyl tubing as a reference point for line resistance. So foam is not just about pressure. It is pressure, temperature, and line resistance agreeing with each other.
Serve at the pressure that holds the carbonation you built
If the beer was carbonated cold at a given pressure, the cleanest plan is usually to serve at roughly that same pressure and use line resistance to calm the pour. New brewers often try the opposite. They carb high, then slash the serving pressure low, then wonder why the beer acts different from day to day.
That cycle gets messy because the keg is always trying to move back toward equilibrium. The beer is either giving up gas or trying to absorb more. That is why the first pint can be wild and the next one merely annoying.
Use line length as a tuning tool, not an afterthought
If the line is too short, the beer races to the faucet and loses carbon dioxide on the way out. Hello foam. If the line is a bit longer, the beer slows down and stays calmer. That is why cutting line because the pour feels “too slow” can backfire. Slow and clean beats fast and frothy every time.
For readers building a serving setup from scratch, these step-by-step builds for a kegerator or a keezer help with the hardware side, especially line routing, collar choices, and draft balance.
Remember: balance is not a magic PSI number. It is the beer temperature, carbonation level, serving pressure, and line resistance all behaving like they know each other.
Diagnose foam, flat beer, and leaks before you touch random settings
This is where most people actually need help. Not the theory. The moment when the tap is hissing foam and the regulator looks innocent.
The same Brewers Association manual says beer should stay at or slightly below 38°F through storage and serving, and it notes that a keg warming only a few degrees above that can create pouring trouble. It also says even a keg that “feels cold” at 44°F can need about 18 hours to get back to 38°F. So the first check is often the least glamorous one: measure beer temperature, not just air temperature in the fridge.
| Symptom | Likely cause | Check first | Likely fix |
|---|---|---|---|
| Foamy first pour | Warm faucet or line, short line, keg not fully chilled | Beer temp at the keg, line length, tower warmth | Chill longer, add line resistance, steady the serving temp |
| Foam on every pour | Overcarbed beer, pressure mismatch, gas leak causing weird compensation | Regulator setting, leak test, vent behavior | Reset pressure, vent in steps if overcarbed, fix leaks |
| Beer seems flat | Not enough time on gas, warm keg, hidden leak | Keg temp, lid seal, gas-side bubbles | Chill fully, reseat lid, hold steady pressure longer |
| Weak or no pour | Empty tank, shutoff closed, disconnect not seated, clogged poppet | Tank pressure, line path, disconnect fit | Open the gas, reseat fittings, clean or replace the poppet |
Change one thing, then pour again
This sounds simple because it is. But it matters. If you lower the pressure, shorten the line, vent the keg, and fiddle with the thermostat all in one burst, you will not know which change did what. Keep a small note on the keg or in the brewing log: beer temp, PSI, line length, and the symptom. That tiny habit saves hours.
Do not ignore cleaning when the pour looks bad
The same manual sets a minimum line-cleaning cycle of every two weeks for draught systems, with faucets and couplers cleaned on that rhythm too. Homebrew setups are smaller and simpler, but dirty lines still create foam, off-aromas, and strange pours that get blamed on pressure. If a line smells sweet-sour, buttery, or stale, no regulator tweak will fix that.
Handle the awkward scenarios before they turn into batch-day surprises
Kegging without a permanent draft fridge
You can still keg. Chill the keg in whatever cold space you have, use a picnic tap, and keep expectations realistic. The beer can be good. The pour may not be elegant, and that is okay for a temporary setup. The real annoyance is temperature drift, not the keg itself.
Natural carbonation in a keg
This is a valid path, not a fallback for people doing kegging “wrong.” Prime the keg as you would bottles, give it conditioning time, and expect sediment to settle at the bottom. The first pint can pull some of that through. After that, the keg usually pours clean.
Bottling from the keg
If a competition, bottle share, or gift box pops up, you do not need to panic-rack an entire batch back into bottles. Chill the beer, lower the pressure, and bottle from the tap or a bottle filler with as little turbulence as possible. Short fill lines and cold bottles help a lot.
Hop-heavy beer needs cleaner handling
The more the beer leans on fresh hop aroma, the more packaging quality shows up in the glass. A closed transfer, a well-purged keg, and fewer casual openings of the lid are worth the extra minute. That is where kegging homebrew beer starts to feel less like packaging and more like protecting the work you already did.
Cold, sealed beer will hold up better than warm, oxygen-exposed beer, but not all styles age on the same clock. A roasty stout can stay pleasant for quite a while. A bright IPA can start losing its edge much sooner. Match the fussiness to the beer.
FAQ
Do I need to cold crash before kegging?
No. You can keg without cold crashing. Cold crashing just helps drop more yeast and hop matter before transfer, which can mean a cleaner first pint and less sediment in the keg. If the beer is very hop-heavy or has a lot of suspended material, cold crashing is handy.
How full should a Cornelius keg be?
Leave a little headspace under the lid so the keg can seal and hold pressure. Do not fill right into the gas dip tube or pack beer up against the lid. Most brewers stop a bit below the gas dip tube opening and call it good.
Why is only the first pour foamy?
Warmth at the faucet or tower is the usual suspect. The beer sitting in that short stretch warms up between pours, then flashes carbon dioxide when it hits the glass. A fully chilled keg can still give a foamy first pour if the faucet and upper line keep warming between sessions.
